
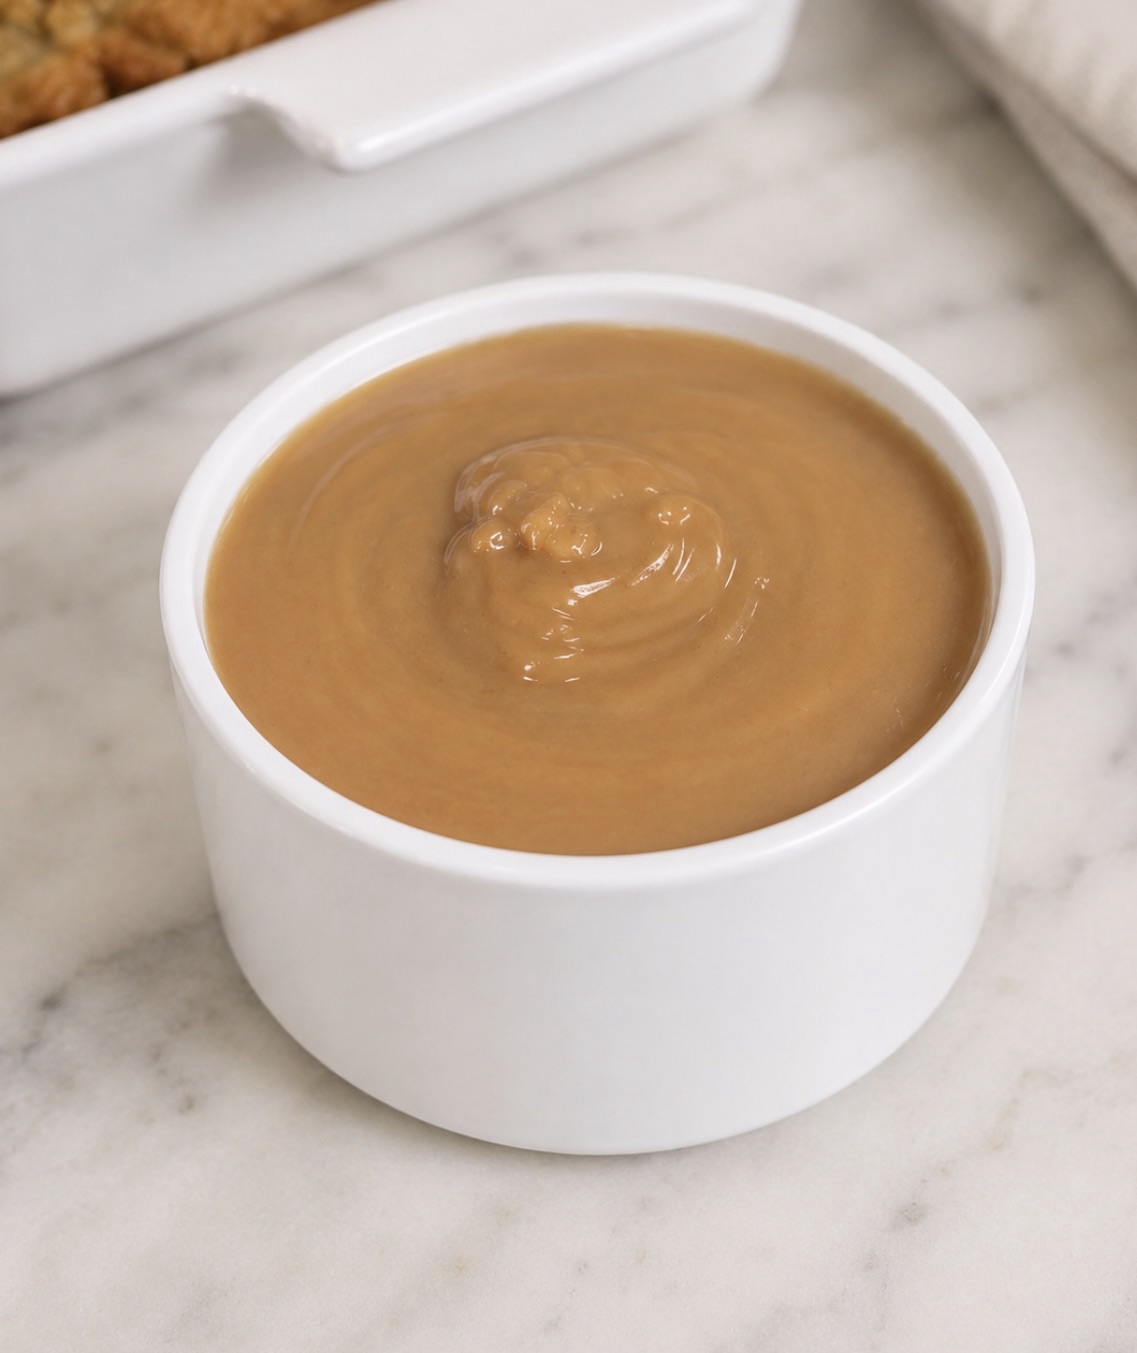
Turkey gravy is made by separating the fat from your turkey’s pan drippings, building a roux with that fat and flour, then whisking in the drippings and stock until thickened, with a make-ahead version possible using roasted turkey wings for the base.
Gravy is the one part of Thanksgiving that has to happen in the last 30 minutes, while everything else is coming off the stove or out of the oven at once. It doesn’t have to be that stressful.
Most of the actual work can happen a day or two ahead. What’s left for the day itself is just finishing it with the real drippings.
Key Takeaways
- A roux is equal parts fat and flour, roughly 6 to 8 tablespoons of each for 3 to 4 cups of finished gravy
- Separating the fat from the pan drippings, then deglazing the roasting pan itself, is where most of the real flavor comes from
- A make-ahead base built from roasted turkey wings can be made 1 to 2 days ahead and finished with real drippings on the day
- Lumpy gravy is a whisking problem, not a recipe problem, and a fine-mesh strainer fixes it after the fact if needed
- This freezes well, unlike cream-based gravies, since it’s built on stock and drippings rather than dairy
Table of Contents
Where the Real Flavor Comes From
Most of what makes gravy taste like something instead of flour-thickened water happens before the roux. Whatever’s left in the roasting pan after the turkey comes out, the browned bits stuck to the bottom, carries more flavor than people give it credit for.
Deglazing that pan with a splash of stock, scraping up those browned bits while it heats, is a real step, not an optional flourish. Skipping it is the difference between gravy that tastes like the turkey and gravy that tastes like a jar of stock with some fat in it.
Ingredients
Turkey pan drippings, separated: From your roasted turkey. Use a fat separator to pull the fat off the top from the flavorful liquid underneath.
All-purpose flour, 6 to 8 tablespoons
Turkey or chicken stock, enough to bring the total liquid to 3 to 4 cups combined with the drippings
Salt and black pepper, to taste
Optional: a splash of white wine for deglazing, a small splash of soy sauce if the gravy needs more color and savoriness, or a pinch of sugar to round out sharpness.
Equipment
A fat separator is the one tool that makes this technique possible at all. It lets the fat rise and settle above the flavorful liquid so you can pour off just the liquid you want, which is genuinely hard to do accurately by eye alone. The OXO 4-cup fat separator is the one I reach for every year.
A good whisk is non-negotiable, both for building the roux and for the constant motion that keeps lumps from forming while liquid goes in.
If lumps happen anyway, a fine-mesh strainer fixes it after the fact, pressed through with a spatula.
Once the gravy’s done, an insulated gravy boat keeps it properly hot at the table instead of skinning over in a normal pitcher within ten minutes.
How to Make Turkey Gravy From Drippings
Step 1: Separate the drippings
Pour all the pan drippings into a fat separator and let it sit 2 to 5 minutes so the fat rises to the top. Reserve some of that fat for the roux, and set the defatted liquid aside.
Step 2: Deglaze the roasting pan
Place the roasting pan over medium heat on the stovetop and add a splash of stock or wine, scraping up the browned bits stuck to the bottom as it heats. Combine this with your reserved drippings and top up with additional stock to reach 3 to 4 cups total liquid.
Step 3: Build the roux
In a saucepan, melt 6 to 8 tablespoons of the reserved turkey fat over medium heat. Whisk in an equal amount of flour and cook, stirring constantly, for 1 to 5 minutes, until it smells nutty rather than raw and turns pale gold.
Step 4: Add the liquid and simmer
Slowly whisk in the combined drippings and stock, a little at a time, whisking constantly so it doesn’t clump. Bring to a simmer and cook 5 to 10 minutes, until it thickens enough to coat the back of a spoon.
Season with salt and pepper to taste. If it’s thinner than you want, keep simmering to reduce it further rather than adding more flour straight into the hot liquid.
The Make-Ahead Base (So Thanksgiving Day Is Easier)
This is the part that genuinely reduces day-of stress, and it’s a real, widely used technique, not a shortcut that sacrifices quality.
Roast turkey wings, necks, or legs at 400 degrees for about an hour to an hour and 15 minutes, until well browned, along with a rough chop of onion, carrot, celery, and thyme. Transfer everything to a pot, cover with water, and simmer uncovered for about 1.5 hours to build a rich, gelatin-heavy stock, since the collagen from the wings gives it a body close to real drippings.
This base can be made 1 to 2 days ahead and refrigerated, or frozen up to 3 months. On the day itself, reheat the base and finish it by whisking in the real drippings and deglazed pan liquid from your actual roasted turkey, following steps 3 and 4 above. The whole finishing process takes under 5 minutes since the base is already built.
Storage and Reheating
Refrigerate leftover gravy in an airtight container for 3 to 4 days.
This freezes well, unlike a cream-based gravy, since it’s built on stock and drippings rather than dairy that can turn grainy after freezing. Freeze in an airtight container or bag for up to 3 to 4 months.
Reheat gently on the stovetop over low heat, whisking constantly, and thin with a splash of warm stock if it’s thickened up too much in storage.
Fixing Gravy That Went Wrong
Lumpy: Strain it through a fine-mesh strainer, pressing the solids through with a spatula, or blend it smooth with an immersion blender directly in the pot.
Too thin: Keep simmering to reduce and concentrate it, or whisk in a small fresh roux, a tablespoon each of butter and flour cooked together first.
Too thick: Whisk in more warm stock, a little at a time, rather than water, so you don’t dilute the flavor.
Tastes like raw flour: The roux wasn’t cooked long enough before the liquid went in. Simmering the finished gravy an extra 5 to 10 minutes usually cooks out the raw taste even after the fact.
Bland: Salt is almost always the actual fix before anything else. A splash of soy sauce adds color and savoriness without tasting like soy sauce, and a splash of wine or a pinch of bouillon adds depth.
FAQ
Why is my gravy lumpy?
Liquid was added too fast without enough whisking, or the roux wasn’t fully smooth before liquid went in. Strain the finished gravy through a fine-mesh strainer or blend it smooth as a fix.
Can I make turkey gravy ahead of time?
Yes. Build a base stock from roasted turkey wings or necks 1 to 2 days ahead, refrigerate or freeze it, then finish it with your actual pan drippings on the day of serving. The finishing step takes under 5 minutes.
Why does my gravy taste like raw flour?
The roux wasn’t cooked long enough before the liquid was added. It should smell nutty, not starchy, before you whisk in stock. If it’s already made, simmering it an extra 5 to 10 minutes helps cook out that taste.
Does turkey gravy freeze well?
Yes, since it’s built on stock and drippings rather than dairy. It keeps well in the freezer for 3 to 4 months, unlike a cream-based gravy, which can turn grainy after thawing.
Can I make this gluten-free?
Yes, swap the flour roux for a cornstarch slurry instead: 1 tablespoon cornstarch dissolved in cold water per cup of liquid, whisked into the hot liquid at the end. It thickens much faster than a roux, so add it gradually.
Turkey Gravy Recipe
Ingredients
- Turkey pan drippings, separated
- 6 to 8 tbsp all-purpose flour
- Turkey or chicken stock, enough to reach 3 to 4 cupscombined with drippings
- Salt and black pepper, to taste
- Optional: splash of white wine, splash of soy sauce,pinch of sugar
Instructions
- Separate the pan drippings using a fat separator. Reserve the fat and set the defatted liquid aside.
- Deglaze the roasting pan with a splash of stock over medium heat, scraping up browned bits. Combine with the reserved drippings and top up with stock to 3 to 4 cups total.
- Melt the reserved turkey fat in a saucepan, whisk in an equal amount of flour, and cook 1 to 5 minutes until pale gold and nutty smelling.
- Slowly whisk in the combined liquid. Simmer 5 to 10 minutes until thickened. Season with salt and pepper.
Notes

Cynthia Odenu-Odenu is the founder of Cyanne Eats. A registered nurse with a passion for food, she brings the same attention to detail from her professional life into the kitchen. From chain restaurant rankings to grocery finds and easy recipes, Cynthia covers it all and helps everyday food lovers eat better and spend smarter.