
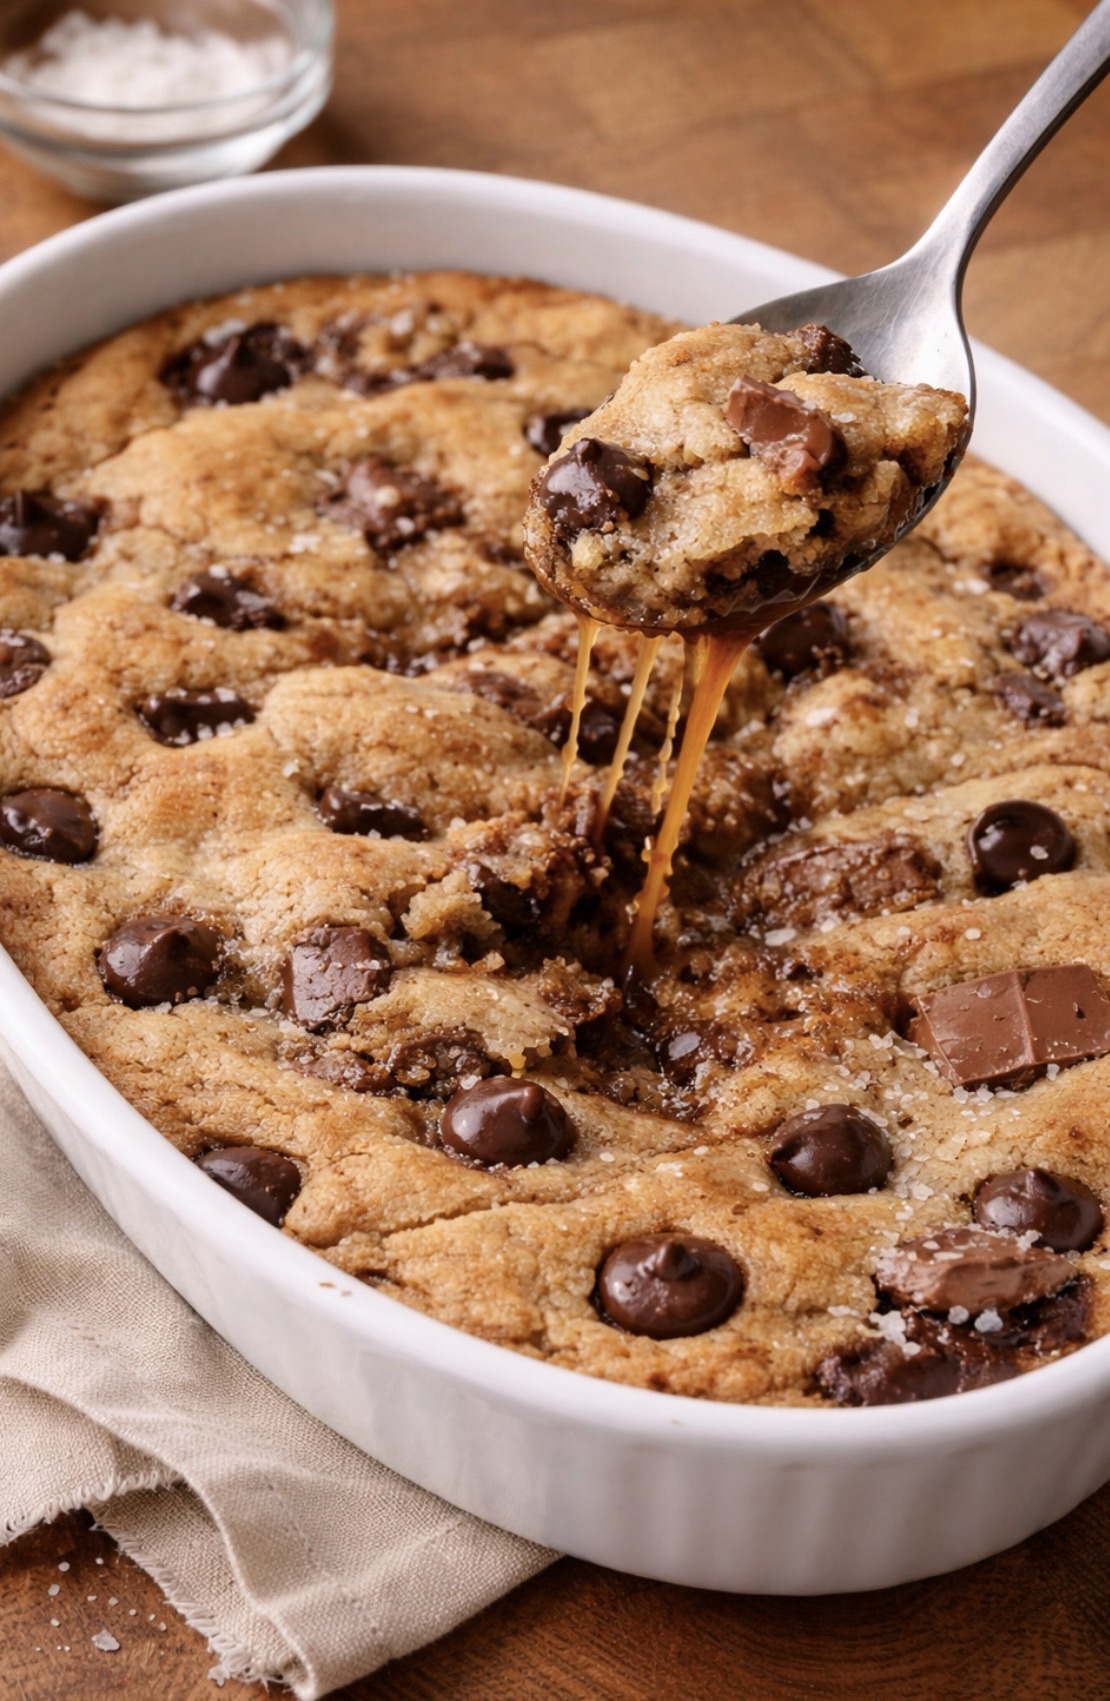
A scoopable cookie is a batch of oversized chocolate chip cookie dough balls baked together in one pan until the edges set and the center stays warm and molten, then scooped directly from the pan with an ice cream scoop.
 1")
This is the TikTok dessert that took over feeds in 2024 and never really left. The format is simple: you pack large dough balls into a small, deep pan, bake until the outside is golden, pull it out while the middle still jiggles, and scoop it warm into bowls with a generous pile of vanilla ice cream on top.
My version uses brown butter. Most scoopable cookie recipes just melt the butter and call it done. Brown butter adds a nutty, toffee-like depth that makes the whole thing taste like it came from a bakery rather than your oven on a Tuesday night. It takes 7 extra minutes and it is absolutely worth it.
Table of Contents
Key Takeaways
- Brown the butter first and let it cool before adding it to the dough. Hot butter scrambles the egg and makes the dough greasy
- Pack the dough balls tightly so they bake against each other. The touching sides stay protected from heat, which is what keeps the center scoopable
- Pull the pan when the edges are golden and the center still jiggles when you nudge the pan. It will look underdone. That is correct
- Rest for 10 to 15 minutes before scooping. The center firms just enough to hold its shape when scooped but stays molten inside
- Flaky sea salt on top right before serving is not optional
Why Brown Butter Changes Everything
Regular scoopable cookie recipes call for melted butter. Melted butter produces a soft, fudgy cookie with a buttery sweetness. That is good.
Brown butter produces all of that plus a layer of toasted hazelnut, toffee, and caramel flavor that you cannot get any other way. When butter heats past its melting point, the milk solids in the fat separate from the liquid and toast against the bottom of the pan. Those toasted milk solids are where all the extra flavor comes from. Every brown speck at the bottom of the pan is flavor. Scrape all of it into the bowl.
The difference is noticeable on the first bite and impossible to go back from once you taste it.
Ingredients
Unsalted butter, 1 cup (2 sticks): This gets browned. Use unsalted so you control the salt level. Salted butter browns fine but the result can taste oversalted once you add the flaky salt at the end.
Dark brown sugar, 3/4 cup, packed: Dark brown sugar has more molasses than light, which adds depth and keeps the cookies chewier. Wholesome Organic Dark Brown Sugar is Fair Trade, non-GMO, and has a richer molasses flavor than standard store brand.
Granulated sugar, 1/4 cup
1 whole egg plus 1 egg yolk: The extra yolk adds fat and richness without adding more white, which keeps the centers fudgy rather than cakey. Use both at room temperature.
Vanilla bean paste, 2 teaspoons: Heilala Pure Vanilla Bean Paste is made from Tongan vanilla beans and has a more complex, floral flavor than standard extract. The paste format also distributes vanilla seeds throughout the dough, which looks excellent.
All-purpose flour, 1 and 3/4 cups: Measured by spooning into the cup and leveling off. Packed flour produces a dry, cakey result.
Cornstarch, 1 teaspoon: Cornstarch inhibits gluten development and keeps the texture tender and fudgy. Do not skip it.
Baking soda, 1/2 teaspoon
Fine salt, 1/2 teaspoon
Chocolate chips or chopped chocolate, 1 and 1/4 cups: Ghirardelli 60% Cacao Bittersweet Baking Chips are the right choice here. The 60% cacao level is bold enough to stand up to the depth of the brown butter without tipping into bitter. Chopped dark chocolate bars also work and create irregular melty pools rather than uniform chips.
Flaky sea salt, for finishing: Jacobsen Pure Flake Sea Salt is hand-harvested off the Oregon coast and has large, light flakes that dissolve on contact with warm cookie. A small pinch goes further than you expect.
For serving: Vanilla ice cream. This is non-negotiable.
What Pan to Use
The pan choice affects the edges, the bake time, and the overall texture.
8-inch or 9-inch round cake pan: Produces even baking, soft edges, and the most photogenic top. Best for beginners. Use a light-colored pan if possible.
8×8 square pan: The most commonly used pan for this recipe. Fits 6 large dough balls with enough room to pack tightly.
10-inch cast iron skillet: Produces the crispiest edges and most dramatic presentation. The Victoria 10-Inch Cast Iron Skillet is pre-seasoned, comes in at a lower price than Lodge, and has a slightly smoother interior finish that makes scooping cleaner.
9×13 pan: Works but requires scaling the recipe up by 1.5x and adds 4 to 6 minutes to the bake time. Best when feeding a group.
| Pan | Dough balls | Bake time at 350°F | Edge texture |
|---|---|---|---|
| 8-inch round | 4 to 5 | 18 to 20 min | Soft |
| 8×8 square | 6 | 18 to 22 min | Soft-medium |
| 10-inch cast iron | 6 to 7 | 20 to 24 min | Crispy |
| 9×13 (1.5x recipe) | 10 to 12 | 24 to 28 min | Soft-medium |
How to Make Scoopable Brown Butter Cookies
Step 1: Brown the butter
Cut the butter into chunks and add it to a light-colored saucepan over medium heat. A light-colored pan lets you see the color of the milk solids as they toast, which is important. A dark pan makes it easy to miss the window between browned and burnt.
The butter will melt, then foam, then quiet down. At about 5 to 6 minutes, you will see small brown flecks forming at the bottom and the whole pan will smell like toasted hazelnut and caramel. That is the signal. Pull it off heat immediately and scrape every brown speck into a large mixing bowl.
Let the brown butter cool for 20 minutes, until it has thickened slightly and is warm but not hot. If you add it to the dough while it is still hot, it will scramble the egg.
Step 2: Mix the dough
Preheat the oven to 350 degrees. Grease your pan with butter or non-stick spray.
Whisk the dark brown sugar and granulated sugar into the cooled brown butter until combined and slightly glossy. Add the whole egg, egg yolk, and vanilla bean paste. Whisk again until the mixture looks smooth and thick, about 1 minute.
Add the flour, cornstarch, baking soda, and salt. Switch to a spatula and stir until just combined and no streaks of dry flour remain. Do not overmix. Fold in the chocolate chips or chopped chocolate.
The dough will be thicker than standard cookie dough and slightly sticky. That is correct.
Step 3: Portion and pack
Use an OXO Good Grips Medium Cookie Scoop to portion the dough into balls about the size of a golf ball, roughly 3 tablespoons each. Place them in the prepared pan so they are touching each other and nearly fill the bottom of the pan. You want them packed in.
At this point you have two options. Bake immediately, or freeze the pan for 15 to 20 minutes before baking. The frozen method produces a slightly more dramatic gooey center because the outside sets faster while the inside stays protected longer. Both work. The frozen method is worth the extra time.
Step 4: Bake
Bake at 350 degrees according to the pan chart above. The cookies are done when the outer edges are golden brown, the tops look matte and set, and the center still jiggles visibly when you nudge the pan. If you stick a toothpick into the center, it should come out with moist, gooey crumbs rather than clean or with wet batter.
The center will look underbaked. It is supposed to look underbaked. Pull it.
Step 5: Rest and serve
Let the pan rest on a cooling rack for 10 to 15 minutes. The center will firm up slightly from the residual heat without losing its molten character.
Scoop directly from the pan using an ice cream scoop or large spoon. Serve into shallow bowls, add a scoop of vanilla ice cream, and finish with a pinch of flaky sea salt. Eat immediately.
How to Know When They Are Done
This is the question that gets asked the most and answered the least clearly in other recipes.
Pull the pan when all of the following are true. The outer edges are golden brown about half an inch in. The tops look matte and dry, not wet or glossy. The center jiggles like a slightly set Jell-O when you nudge the pan. A toothpick into the center comes out with gooey, sticky crumbs stuck to it.
Do not wait for a clean toothpick. A clean toothpick in a scoopable cookie means it is overcooked.
Variations
S’mores version: Add 1/2 cup of mini marshmallows and 3 tablespoons of crushed graham crackers to the dough with the chocolate chips. Press two Hershey squares into the top of each dough ball before baking. The marshmallows will puff and toast against the pan edges.
Nutella swirl: Freeze tablespoon-sized mounds of Nutella on a parchment-lined plate for 30 minutes. Press one frozen Nutella piece into the center of each dough ball before arranging in the pan. The cold Nutella stays in a molten pocket inside the baked cookie.
Peanut butter: Replace 4 tablespoons of the brown butter with 4 tablespoons of creamy peanut butter, added at the same time as the sugars. Drizzle warm peanut butter over the top after baking.
Birthday cake: Replace the chocolate chips with rainbow sprinkles and white chocolate chips. Add 1/4 teaspoon of almond extract with the vanilla.
Double chocolate: Add 3 tablespoons of Dutch process cocoa powder with the dry ingredients. Use a mix of dark and white chocolate chips.
Biscoff: Swirl 3 tablespoons of Biscoff spread over the top of the dough before baking. Crush 4 Biscoff cookies over the top right after pulling from the oven.
Troubleshooting
The cookies came out cakey and dry. The two most common causes are overbaking and too much flour. Pull 2 to 3 minutes earlier next time. Measure the flour by spooning into the cup, not scooping directly from the bag.
The dough is greasy and the cookies spread into a pool. The brown butter was still too hot when the egg was added. Next time, let the browned butter cool until it feels warm rather than hot to the touch, about 20 minutes.
The center is raw, not gooey. There is a difference between raw batter and gooey cookie. If the center looks wet and liquid when scooped, it needed more time. If it looks like dense, fudgy, molten cookie when scooped, that is correct. Bake in 2-minute increments until you hit the target.
The edges are overdone before the center sets. The pan is too small or the dough balls were not packed tightly enough. A deeper pan with more dough balls packed close together gives the center more protection from the outer heat.
The cookies taste flat and not very complex. The brown butter did not brown enough, or the flaky salt was skipped. Make sure the milk solids are actually amber-colored before pulling from heat, and always finish with flaky salt.
Make-Ahead and Storage
Unbaked dough balls: Freeze in a single layer on a parchment-lined plate until solid, then transfer to a freezer bag. Store up to 3 months. Bake directly from frozen at 350 degrees, adding 4 to 5 minutes to the bake time.
Baked pan: Cover with foil and store at room temperature up to 2 days, or refrigerated up to 4 days.
Reheating: Microwave individual portions for 15 to 20 seconds. The center comes back to molten almost instantly. Avoid reheating the whole pan in the oven. It overdries the edges before the center warms through.
Scoopable Cookie vs. Skillet Cookie vs. Pizookie
All three are warm, pan-baked cookie desserts. They differ in format and intention.
| Format | Pan | Texture goal | How it is served |
|---|---|---|---|
| Scoopable cookie | Square or round baking pan | Gooey center, set edges | Scooped into bowls |
| Skillet cookie | Cast iron skillet | Caramelized edges, chewy center | Sliced like a pie or scooped |
| Pizookie (Pizza Hut’s) | Deep dish pan | Very thick, very gooey | Served in the baking dish with ice cream |
The scoopable cookie is distinguished from the other two by the large dough balls packed into the pan rather than spread dough. That format is what creates the dramatic gooey core, because the interior balls never make direct contact with the pan surface.
Conclusion
The scoopable cookie earned its TikTok moment because the format is genuinely better than baking individual cookies when you want the molten center experience. It removes all the fussy parts. No chilling individual dough balls for 36 hours, no babysitting a baking sheet, no timing multiple trays. One pan, one pull, one scoop, done.
The brown butter is the upgrade that most recipes skipped. It takes 7 extra minutes and produces something that tastes meaningfully different from every other version of this dessert.
FAQ
What is a scoopable cookie?
A scoopable cookie is a batch of large dough balls baked together in a single pan until the edges are set and golden and the center stays warm and gooey. It is scooped directly from the pan using an ice cream scoop and served warm, usually with vanilla ice cream.
Why do scoopable cookies need to rest before scooping?
Resting for 10 to 15 minutes allows the residual heat from the pan to continue setting the center just enough to hold its shape when scooped. Scooping immediately out of the oven produces a liquid mess. Resting too long produces a fully set cookie that loses the molten character.
Can I make scoopable cookies without browning the butter?
Yes. Just melt the butter until it is fully liquid and let it cool before using. The cookies will still be delicious. The brown butter version adds a toasted, caramel-like flavor layer that the plain melted butter version does not have.
Why did my scoopable cookies turn out cakey?
Cakey texture in scoopable cookies is almost always caused by overbaking or overmeasuring the flour. Pull the pan 2 to 3 minutes earlier than you think you need to, and spoon flour into the measuring cup rather than scooping from the bag.
Can I make these in a 9×13 pan?
Yes. Scale the recipe up by 1.5 and add 4 to 6 minutes to the bake time. The result is a larger, sharable batch. Reduce baking soda proportionally if scaling.
What ice cream goes best with scoopable cookies?
Classic vanilla is the default pairing and the right one for a brown butter cookie. Salted caramel, coffee, or dulce de leche also work well. Avoid heavily fruit-flavored ice creams, which compete with the chocolate.
Can I freeze the dough?
Yes. Freeze the portioned dough balls in a single layer until solid, then bag them. They bake directly from frozen at 350 degrees with 4 to 5 extra minutes added.
 2")
Scoopable Brown Butter Cookie Recipe
Ingredients
- 1 cup (2 sticks) unsalted butter
- 3/4 cup packed dark brown sugar
- 1/4 cup granulated sugar
- 1 large egg plus 1 egg yolk, room temperature
- 2 tsp vanilla bean paste or pure vanilla extract
- 1 and 3/4 cups all-purpose flour, spooned and leveled
- 1 tsp cornstarch
- 1/2 tsp baking soda
- 1/2 tsp fine salt
- 1 and 1/4 cups semisweet or bittersweet chocolate chips or chopped dark chocolate
- Flaky sea salt for finishing
For serving
- vanilla ice cream
Instructions
- Brown the butter: Cook butter in a light-colored saucepan over medium heat, stirring occasionally, until milk solids turn amber and smell like toasted hazelnut, 5 to 7 minutes. Pour into a large bowl and scrape in all brown bits. Cool 20 minutes until warm but not hot.
- Preheat oven to 350 degrees. Grease an 8×8 or 9-inch round pan.
- Whisk brown sugar and granulated sugar into the cooled brown butter. Add egg, yolk, and vanilla and whisk until smooth and slightly thickened, about 1 minute.
- Add flour, cornstarch, baking soda, and salt. Stir with a spatula until just combined. Fold in chocolate chips.
- Scoop dough into balls roughly 3 tablespoons each. Arrange in the pan so balls are touching and nearly fill the pan. For extra gooey centers, freeze the pan 15 to 20 minutes before baking.
- Bake 18 to 22 minutes until edges are golden and center still jiggles when pan is nudged. Do not wait for a clean toothpick.
- Rest 10 to 15 minutes. Finish with flaky sea salt. Scoop warm into bowls and top with vanilla ice cream.
Notes
Cynthia Odenu-Odenu is the founder of Cyanne Eats. A registered nurse with a passion for food, she brings the same attention to detail from her professional life into the kitchen. From chain restaurant rankings to grocery finds and easy recipes, Cynthia covers it all and helps everyday food lovers eat better and spend smarter.